Our comprehensive donor management system is integrated into your WordPress platform making it easy for you to efficiently manage and track your donor relationships.
You can maintain detailed donor profiles, monitor donation histories, and streamline your communication with supporters. We’ve designed it to act as a centralized hub for all donor-related activities.
This documentation will guide you through the various features and functionalities of the Donation Management System, helping you maximize your organization’s efficiency.
Table of Contents
Getting Started
Charitable gives you the power to access and edit your donation records as you need. This puts the control in your hands to change payment statuses, edit donor details, and even export all the data any time you need.
There are 2 major sections we’ll cover in the Donor Management System:
Managing Donation Records
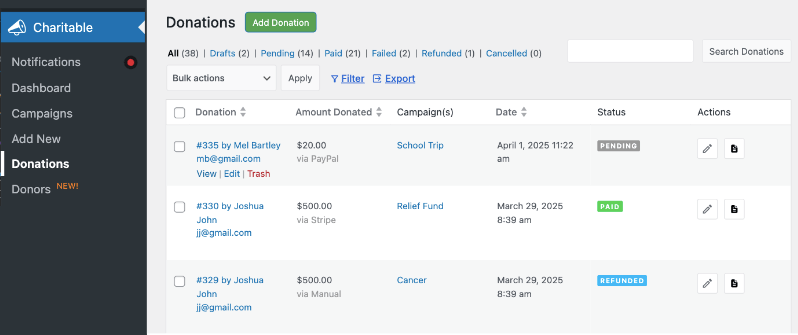
To access your donation records, go to the Charitable » Donations tab in your WordPress dashboard. Here, you’ll see a complete list of all donations.
Overview
These records show you an overview of donors name, email, amount donated, to which campaign, date and status. You can also see the payment status shows you if the donation amount is paid, pending, refunded, or cancelled.
Taking Actions
At the top of this page, there are actions available to help you edit and manage your records without any hassle.

This includes:
- Add Donation: Lets you create a new donation record
- View Only Tabs: Lets you view only the records that are in drafts, pending, paid, failed, refunded, and cancelled
- Filter: Filter the list by date, campaign, and payment status
- Export: Download a CSV file of your entire or filtered donation records list
- Search: Look for a specific donation record
Editing Donation Records
Hover over any donation record and you’ll see options to view, edit, or trash the record. There is also a pencil icon on the left of the record that lets you edit it.

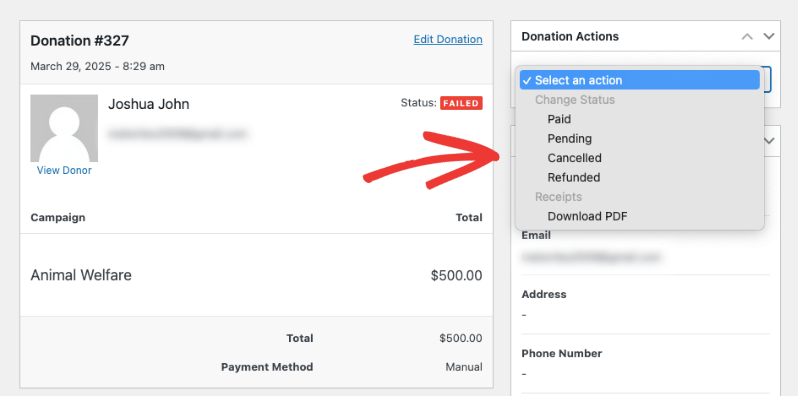
When you choose to edit a donation record, you’ll be redirected to the specific donation record page.
In the left column, you can take actions like:
- Update payment status
- Send receipt copies to donors
- Trigger admin notifications
- Download PDF receipts
Once you make changes here, you’ll see a status that says “Donation updated”. Any changes made will appear in the donation log along with a date and time stamp.
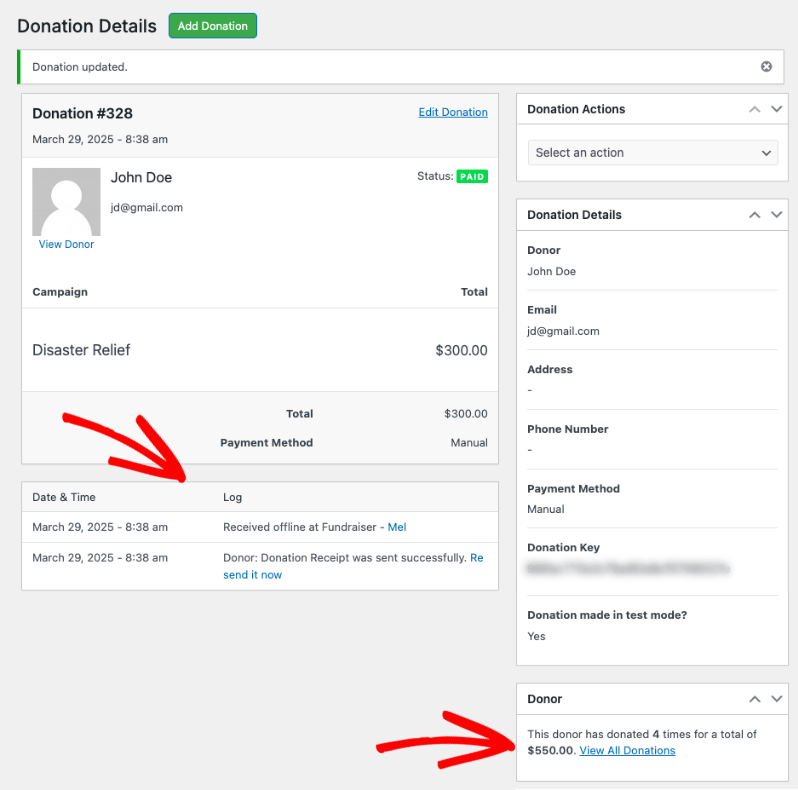
You can also see the donor history, which shows you how many times the donor has contributed to your cause.
Adding a New Donation Record
Use the green “Add Donation” button at the top of the Charitable » Donations page to create a new empty donation record.

In the new donation record that opens, on the left, you can select the campaign and donation amount.
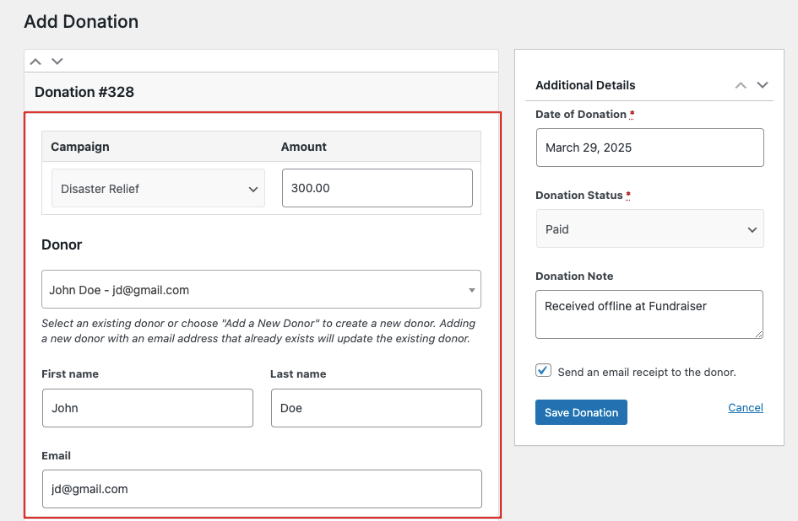
Under the Donor field, you can choose to add a new donor or select an existing donor. If you choose an existing donor, the fields will autopopulate from their donor record. For new donors, you need to fill out the form manually.
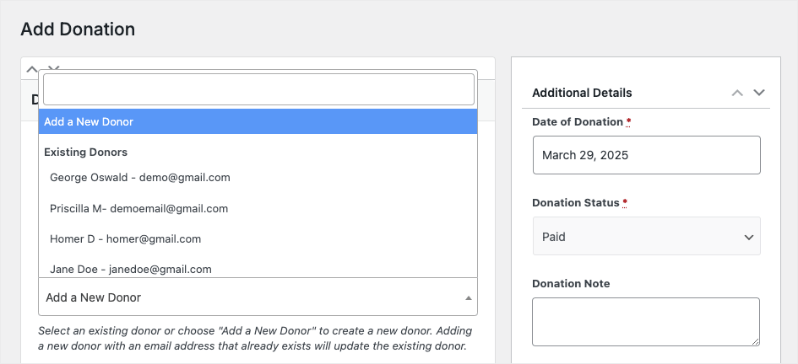
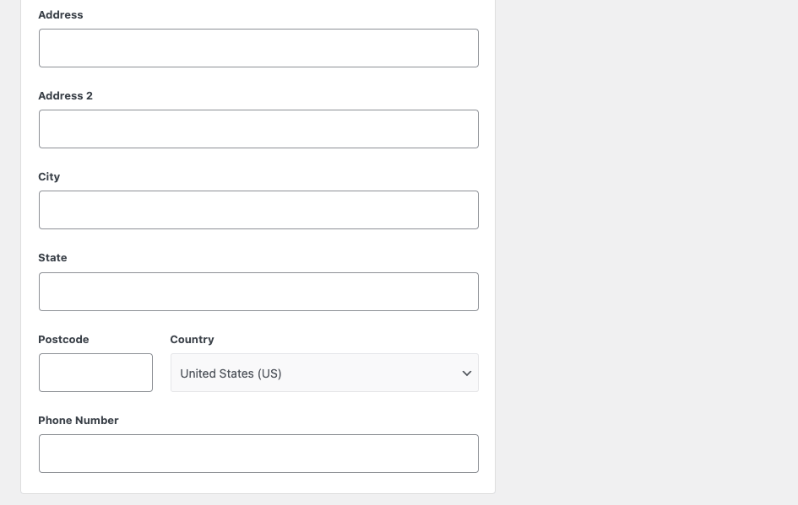
You can add donor details such as their name, address, city, state, postcode, country, and phone number.
Next, on the right panel, there are options to include additional details. These include:
- Date of donation
- Donation status
- Donation note
You can also choose to email the donation receipt to the donor.
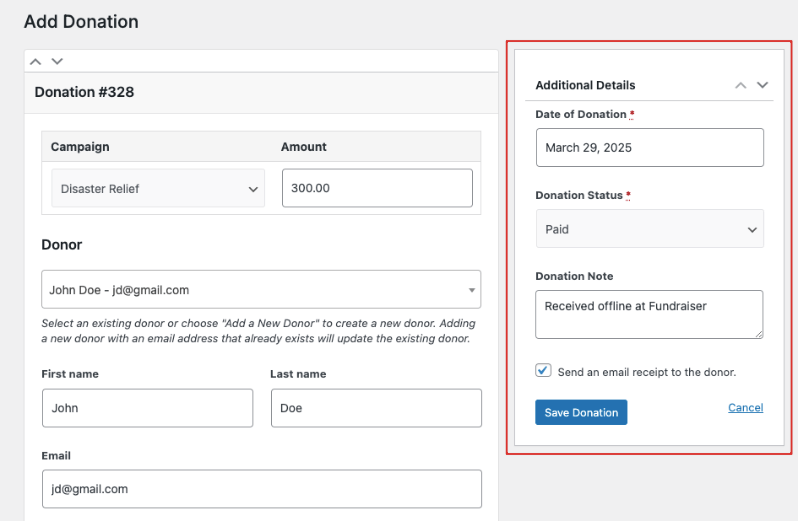
Make sure you click the Save Donation button to store your new donation record.
Managing The Donor Database
To access the donor database, log into your WordPress admin panel and navigate to the Charitable Pro » Donors tab.
You’ll be presented with a clean, organized interface displaying your complete donor list. Each donor entry includes essential information such as their name, email address, total donations, frequency of contributions, and the date they joined.
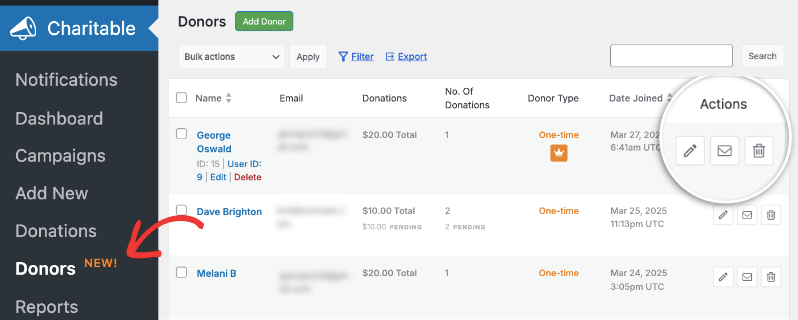
The main dashboard is designed for quick actions and easy navigation. You can instantly identify donor types (one-time, recurring, or top donor) and take actions using the icons on the left. These include:
- The pencil icon allows for quick profile edits
- The envelope icon lets you send emails to the donor
- The trash bin icon helps delete donor records when needed
Managing Donor Profiles
Every donor gets their own donor profile page that serves as a comprehensive record of each supporter’s relationship with your organization. To access a donor’s profile, simply click their name or the pencil icon from the main dashboard.
The profile page is thoughtfully organized into two main sections: an overview summary header and detailed information tabs.
Managing Basic Information
Overview
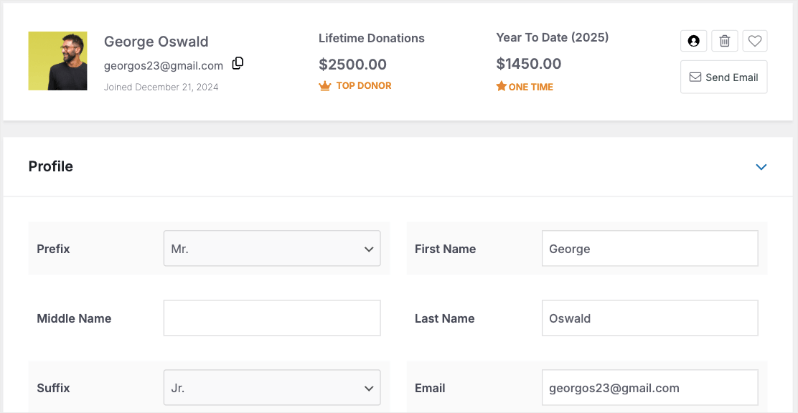
At the top of each profile, you’ll find a snapshot of essential donor information. This includes their avatar, full name, email address, and join date.
The summary also displays valuable metrics such as lifetime donations and year-to-date contributions.
Quick action buttons allow you to adjust user settings, mark donors as favorites, send emails, or manage their records.
Profile Details
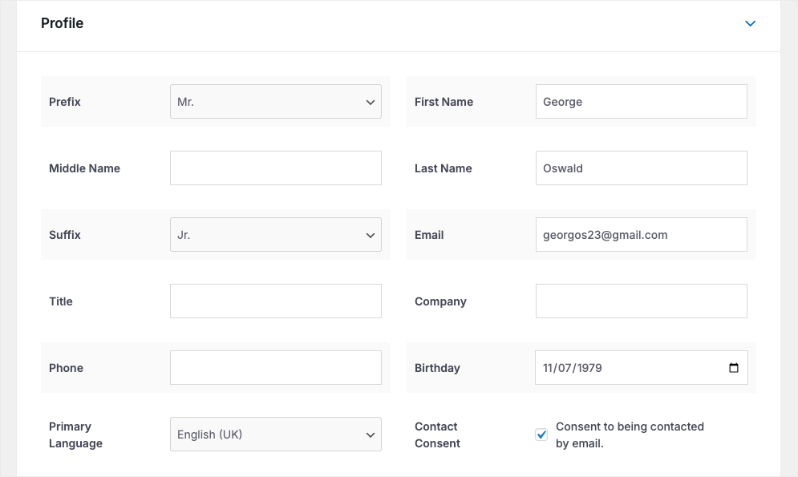
The primary profile section allows you to maintain detailed contact information. You can edit standard fields, including:
- Personal details (prefix, first, middle, and last name, suffix)
- Professional information (title, company)
- Contact details (email, phone number)
- Communication preferences (primary language, contact consent)
Tags & Custom Fields

To better organize your donor database, the system offers two powerful features:
Tags System: Create and assign tags like “important” or “flood relief” to categorize donors and make them easily searchable. Tags are flexible and can be customized to match your organization’s needs.
Custom Fields: The custom fields feature allows you to adapt donor profiles to your specific requirements.
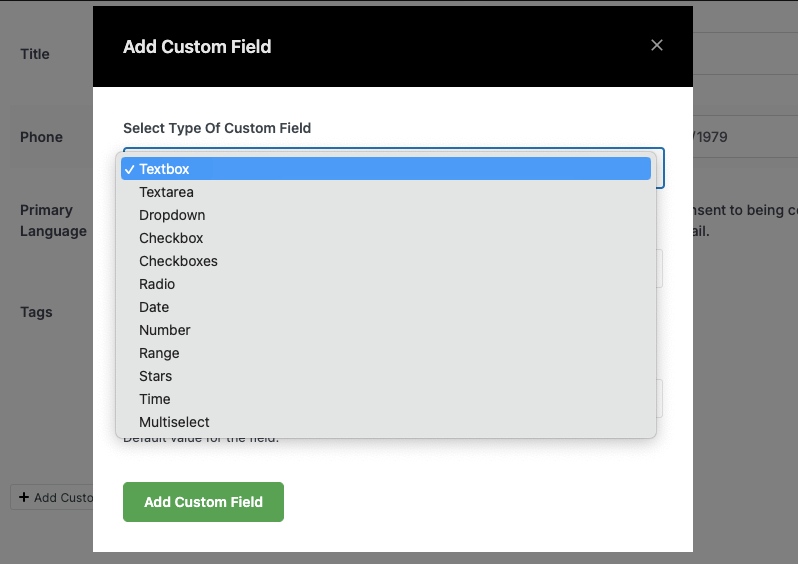
You can add various field types, including:
- Text boxes for additional notes
- Checkboxes for preferences
- Dropdown menus for categorization
- Date fields for important milestones
- Range selectors for engagement levels
- Star ratings for donor prioritization
For instance, you could add a dropdown field where you can assign a relationship manager to the donor, like this:

After making any modifications to a donor’s profile, simply click the “Update Donor” button. A confirmation message will appear at the top of the page to confirm your changes have been saved successfully.
Multiple Contact Management
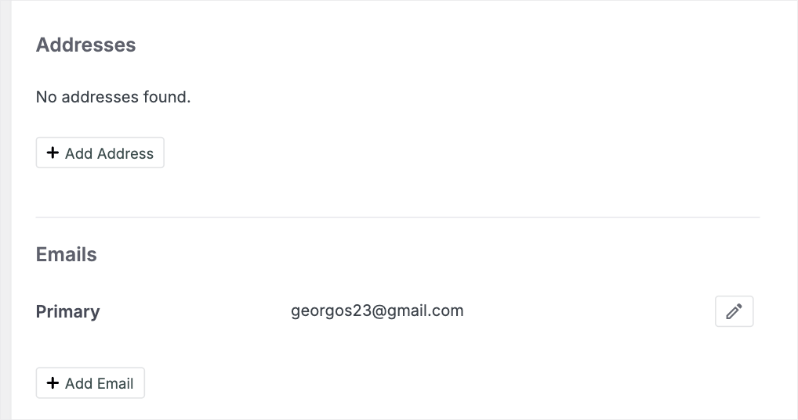
The system supports multiple addresses and email addresses for each donor, ensuring you can maintain complete contact records for donors with various locations or contact points. Each entry can be easily added, edited, or removed as needed.
Managing Advanced Donor Details
Beyond basic profile management, the Donor Dashboard offers powerful tools for tracking and managing detailed donor information through organized tabs.
These tabs work together to create a complete picture of your donor’s journey, from their giving history to their social media presence and engagement with your organization.
Donations
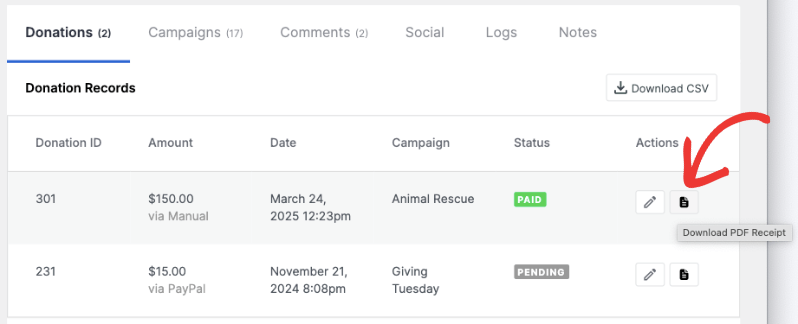
The Donations tab provides a comprehensive view of a donor’s giving history. Here you’ll find a chronological record of all contributions, including donation amounts, dates, associated campaigns, and payment statuses. Each donation entry features tools for quick management:
- Edit individual donation records by clicking the edit icon
- Generate and download PDF receipts instantly
- Export the complete donation history as a CSV file for analysis or reporting
Campaigns
This tab displays all campaigns associated with the donor, whether they’ve created or participated in them. It offers a quick way to track donor engagement across different initiatives and helps identify their areas of interest.
Comments

If you’ve enabled donor comments, any message left by this donor on various campaigns will show up here in the Comments tab.
As an administrator, you can:
- Review comment content
- Approve or unapprove comments
- Track engagement patterns
- Maintain community standards
Social Media Integration
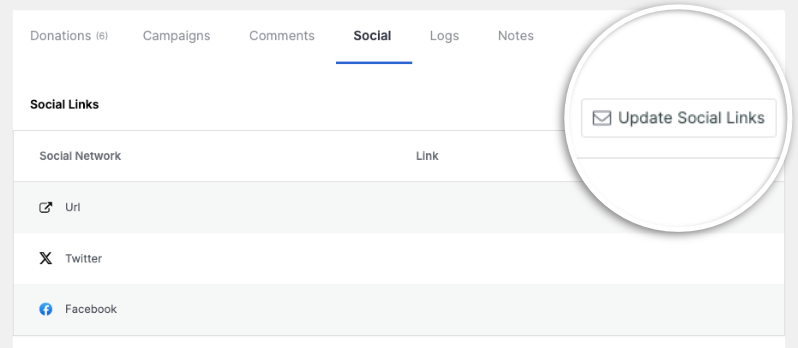
The Social tab helps you maintain a complete picture of your donor’s online presence. Click the Update Social Links button to add various social media profiles, including:
- Facebook, Instagram, and X (formerly Twitter)
- Professional networks
- Content platforms like YouTube
- Messaging apps like WhatsApp
- Custom URLs for other online presences
Activity Logs
The Logs tab serves as your audit trail, maintaining a detailed record of all changes made to the donor profile. This feature is particularly useful for:
- Tracking profile updates
- Monitoring user activity
- Ensuring accountability
- Troubleshooting issues
Notes
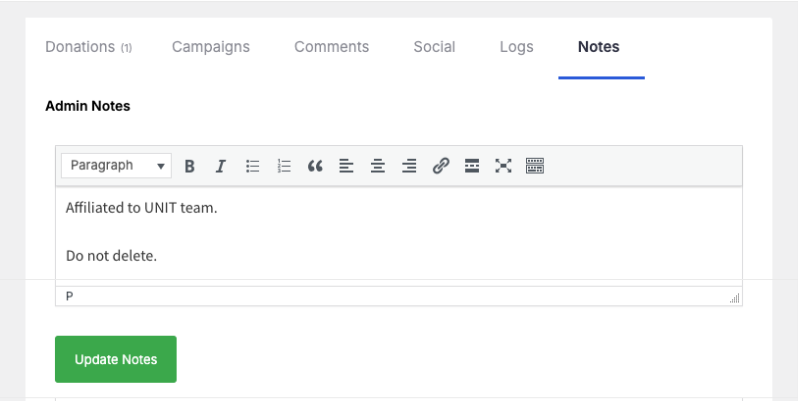
The Notes tab provides a space for storing important information about your donor relationships. Both administrators and donors can add notes, making it valuable for recording communication highlights, tracking preferences, and documenting special requirements. This helps you maintain a relationship history and connect with the donor in a more personalized manner.
Creating a New Donor Profile
Charitable lets you manually create donor profiles when you need. This is helpful when donors make offline donations or donations through other platforms. With this feature, you can use Charitable as your centralized donor database.
To add a new donor profile, in the Charitable » Donors page, click on the green Add Donor button.

This will open up a blank donor profile. You can fill in all the details that include:
- Prefix and suffix
- First, middle, and last Name
- Email and phone
- Title
- Company
- Birthday
- Primary Language
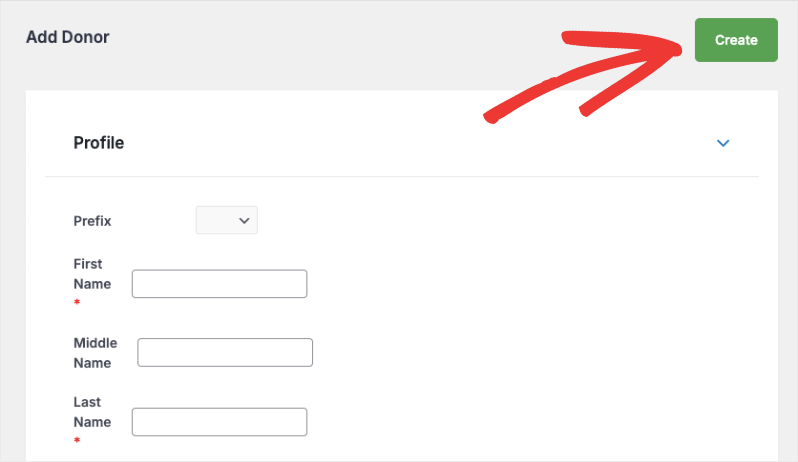
Hit the Create button at the top-right corner to create the new donor profile. Now you’ll be taken to the donor profile page where you can view, add, or delete donor information.
Filtering & Exporting The Donor Database
Charitable makes it easy to find specific donor profiles and to filter your donor database as you need.
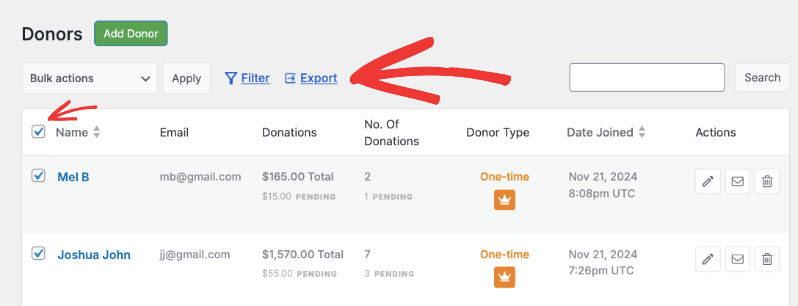
In the Charitable » Donors page, click on the Filter button in the top menu.

This will open a popup with filtering options that you can use with just clicks of your mouse.
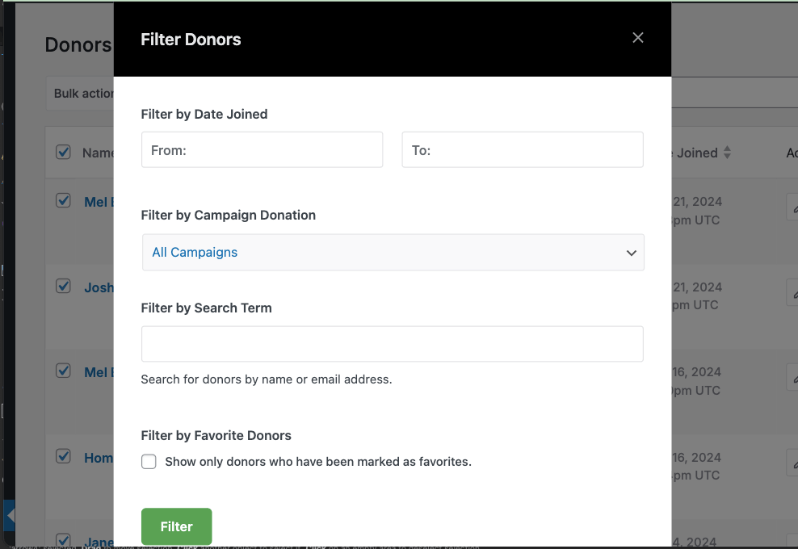
The options let you filter by:
- Date range
- Campaigns
- Search terms
- Favorite donors
Once you’ve chosen the options you need, click on the ‘Filter’ button. Charitable will display the donor list according to the filters applied.
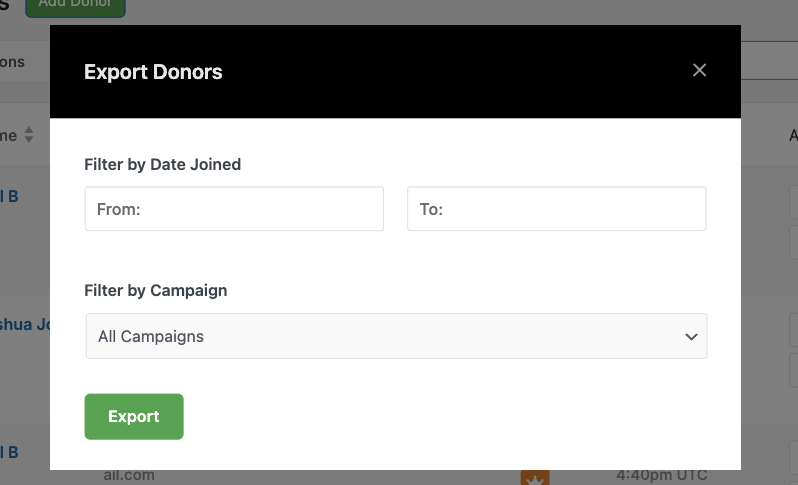
To export your entire donor database, click on the Export button and again on the Export button in the popup. If you’d like to include/exclude specific donors, you can use the checkboxes next to their names.
To export a filtered view, click on the Export button, then in the popup that appears, you can add filters by date and campaign. Then hit the Export button and a CSV file will be downloaded to your computer.
With that, you know how to use the Donor Management System, including donation records and the donor database.
