The Donor Dashboard provides a personalized and secure space for your donors to manage their information, view donation history, and access important documents, making it easy for them to stay connected with your organization.
To access the Donor Dashboard settings, navigate to Charitable » Settings » Donors » Donor Dashboard in your WordPress admin. Here, you can enable the dashboard and customize the fields you want to appear.
First, let’s explore what your donors see when they login to the Donor Dashboard.
Viewing the Donor Dashboard as a Donor
This section shows you the front end of the dashboard that donors will see. You can customize this dashboard and we’ll show you how to do that in the next section.
Overview
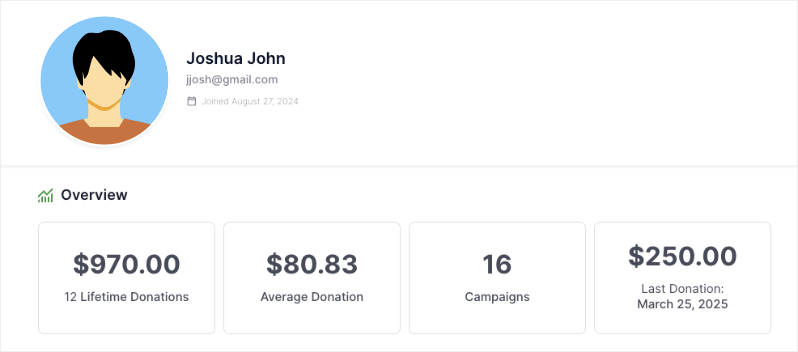
First, they will see an overview of their donation metrics that include:
- Lifetime donations
- Average donations
- Number of campaigns they’ve contributed to
- The last donation they made
Personal & Donation Information
There are several tabs to keep things organized, each providing access to different features and information. By default, Charitable will show the Profile, Donations, and Settings tabs. Optional tabs include Comments and Settings.
Let’s explore each tab.
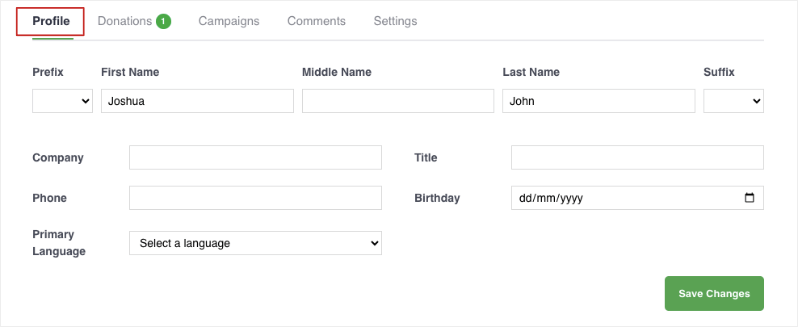
Profile
Donors can update their profile information, including:
- Prefix, name and suffix
- Company and title
- Phone
- Birthday
- Primary language
- Address
- Social profiles
- Avatar
Donations
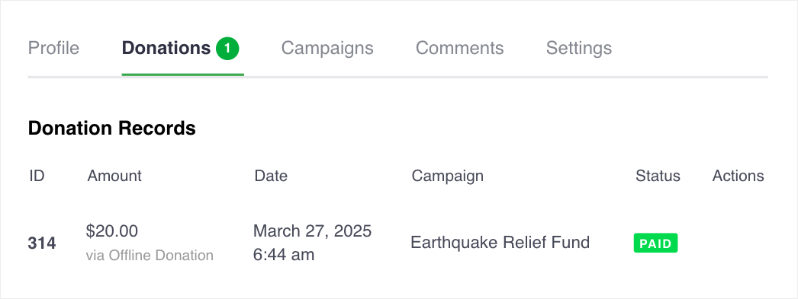
There are 2 tabs that will show donors their one-time donations and recurring contributions. They’ll see a list of their donations, including details such as amount, campaign, date, payment method, and status. They can also download a PDF receipt for each donation.
Campaigns
This will show donors a list of campaigns they’ve contributed to along with the donation amount, status, and end date.
Comments
This will show donors a list of the comments they have posted on their donations. They can also see if their comment has been approved or is pending approval.
Settings
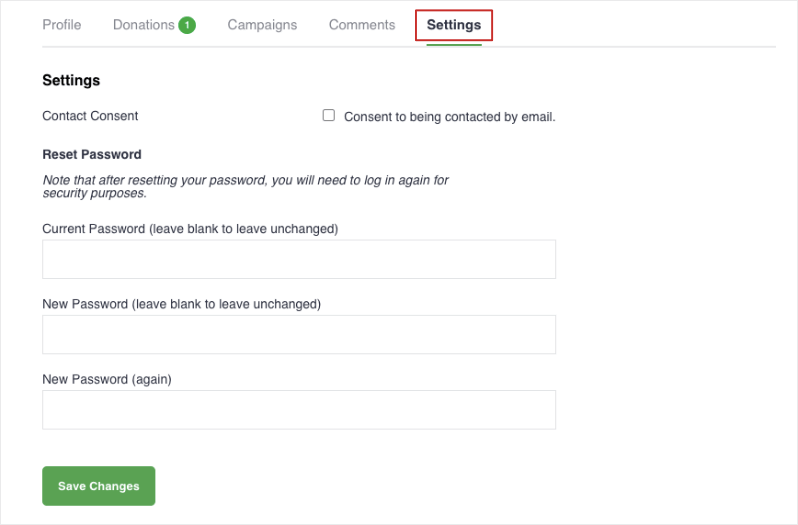
They can consent to being contacted by email. They can also update their password for added security.
Now let’s learn how to customize this dashboard.
Customizing the Donor Dashboard as Admin
This section shows you how to customize the donor dashboard and control what will appear to the donor on the front-end.
To enable and customize the donor dashboard, go to the Charitable » Settings » Donor Dashboard page in your WordPress admin.
On this page, you’ll see a toggle switch to enable/disable the dashboard with one click. Click on it to enable the dashboard.
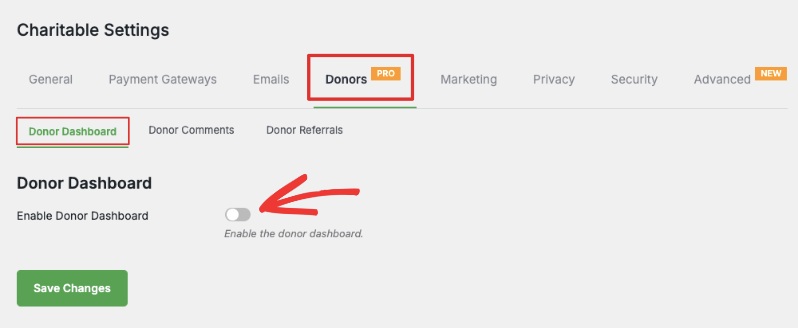
Below this, you can decide what information you want to appear in the dashboard.
Customize the Overview

You can choose to show/hide these fields that appear in the Overview section:
- Lifetime Donations: Shows the total amount the donor has given across all campaigns which shows their overall impact.
- Average Donation: Displays how much the donor gives on average
- Campaigns: Shows how many campaigns they’ve participated in and helped
- Last Donation: Shows most recent contribution date and amount
Customize Communication & Social Preferences
Next, you can choose to allow donors to add and manage their postal or shipping addresses as well as email addresses.
You can also allow them to add and edit their social media links.

Customize Profile Information
Remember, Charitable can show these tabs:

- Profile: Appears by default and can be customized
- Donations: Appears by default and is automatically configured, no customizations needed
- Campaigns: Can be shown or hidden
- Comments: Can be shown or hidden
- Settings: Appears by default and can be customized
Profile Tab
By default, Charitable will show first and last names. You can customize other fields that appears in the Profile tab:
- Prefix (Mr., Mrs., etc)
- Suffix (Jr., Sr., etc)
- Middle Name
- Company
- Title/Position
- Phone Number
- Birthday
- Primary Language
- Avatar Upload
By default, all fields are selected for you. Simply click on the ticked checkbox to unselect the ones you want to hide.

Note: The choices you make here will not affect the fields that are visible in your admin Donor Management area.
Donations Tab
This tab appears by default and is automatically configured. It will display a list of all the donations made by the donor across all campaigns. They can manage their donation records and download PDFs here. There are no customizations needed.
Campaigns Tab
You can choose to display a list of all campaigns the donor has created or participated in.
Simply click the checkbox next to Campaigns to enable this feature and save your changes.

Comments Tab
You can choose to display any comments made by the donor across various campaigns. They’ll be able to see the status of their comment as well.
Simply click the checkbox next to Comments to enable this feature and save your changes.

Pro Tip: Collect only the information you need from donors. This increases the chances of getting your donors to fill out all the fields in the dashboard.
Settings Tab
This tab gives your donors the option to consent to being contacted by email or withdraw their consent.
You can also give them to option to change their password for added security. You can enable this option in the same Donor Dashboard settings page like so:

Hit the ‘Save Changes’ button to store all your dashboard settings.
That’s it. You’ve learned how to use the Donor Dashboard. Next, you may also want to learn more about How to Use the Donor Management System »
