Note: These setup instructions are no longer relevant as of Charitable Authorize.Net 1.2.0.
To use Recurring Donations with our Authorize.Net integration, there are a few steps you need to take in order for recurring donations to be properly tracked.
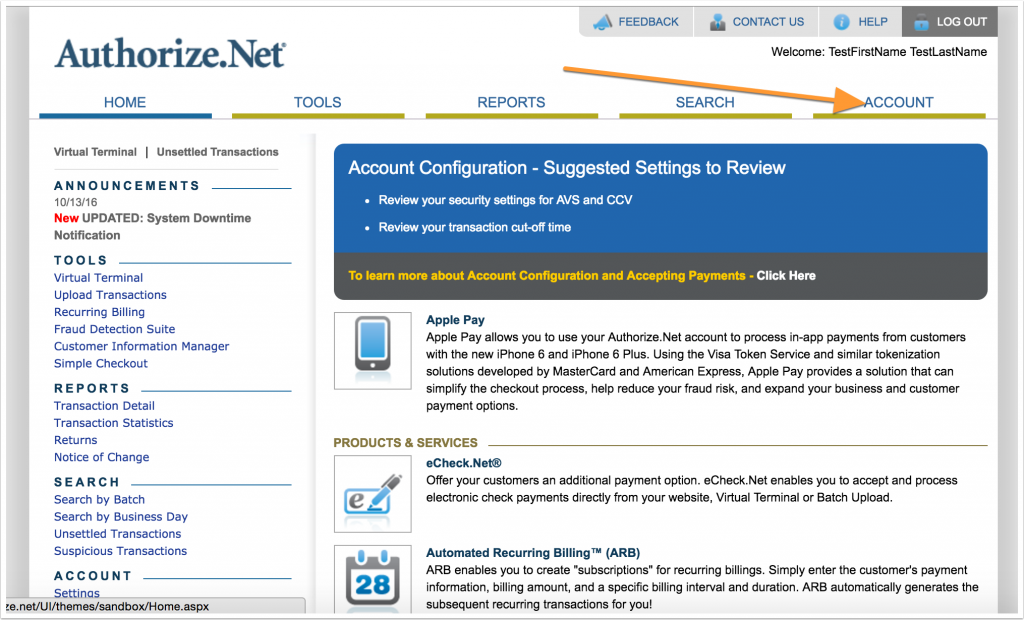
Login to your Authorize.Net account and click on Account.
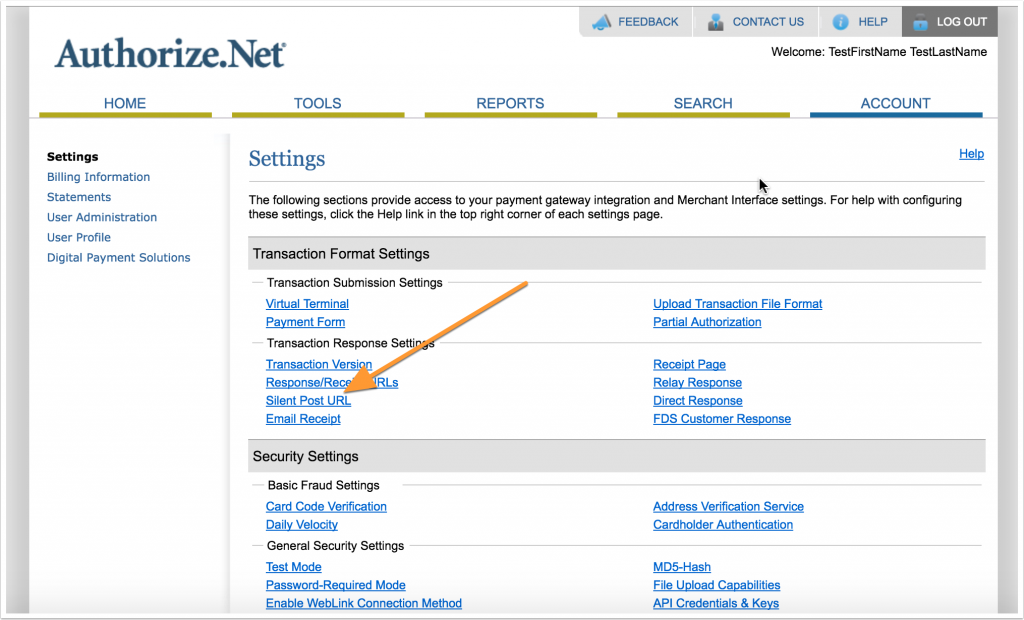
Click on Silent Post URL.
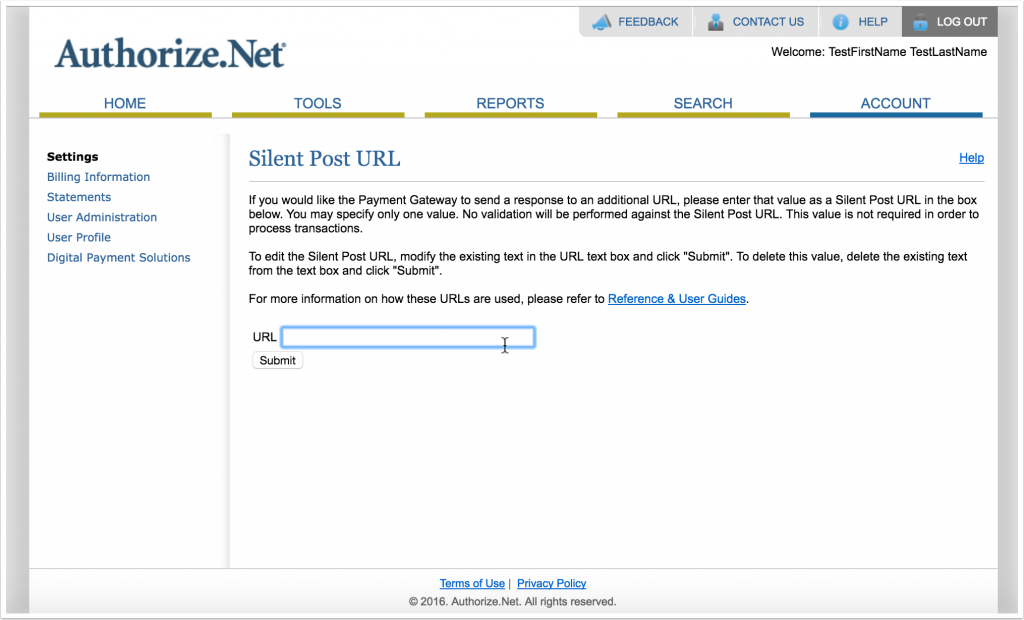
Your Silent Post URL should be set up as your website URL with ?charitable- listener=authorize-net added to the end.
For example, if your website is https://example.com, your Silent Post URL should be set to https://example.com?charitable-listener=authorize-net
After saving your Silent Post URL, return to the Account page and click on MD5-Hash.
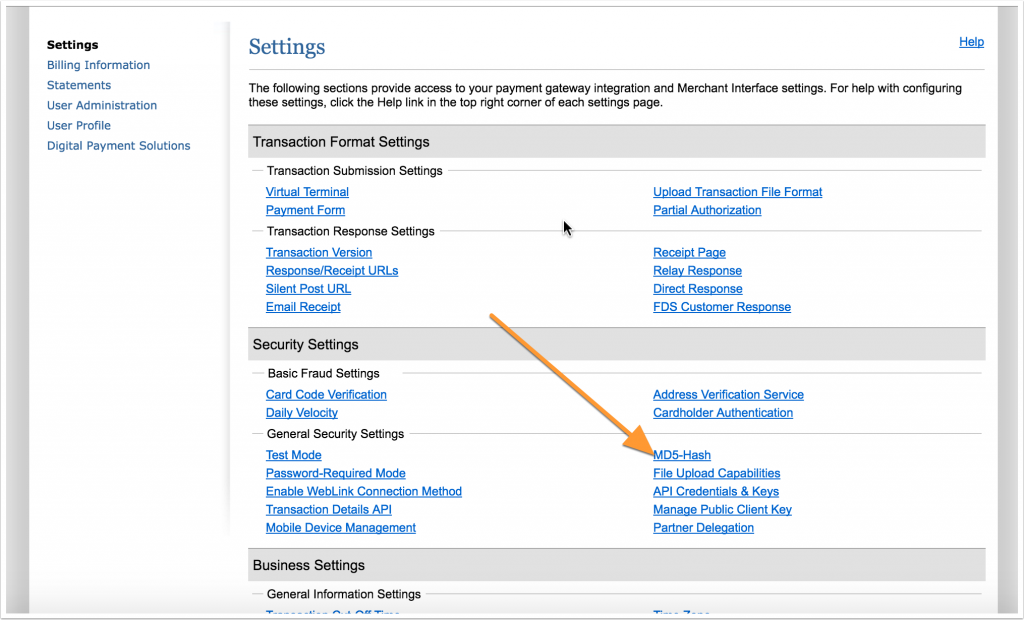
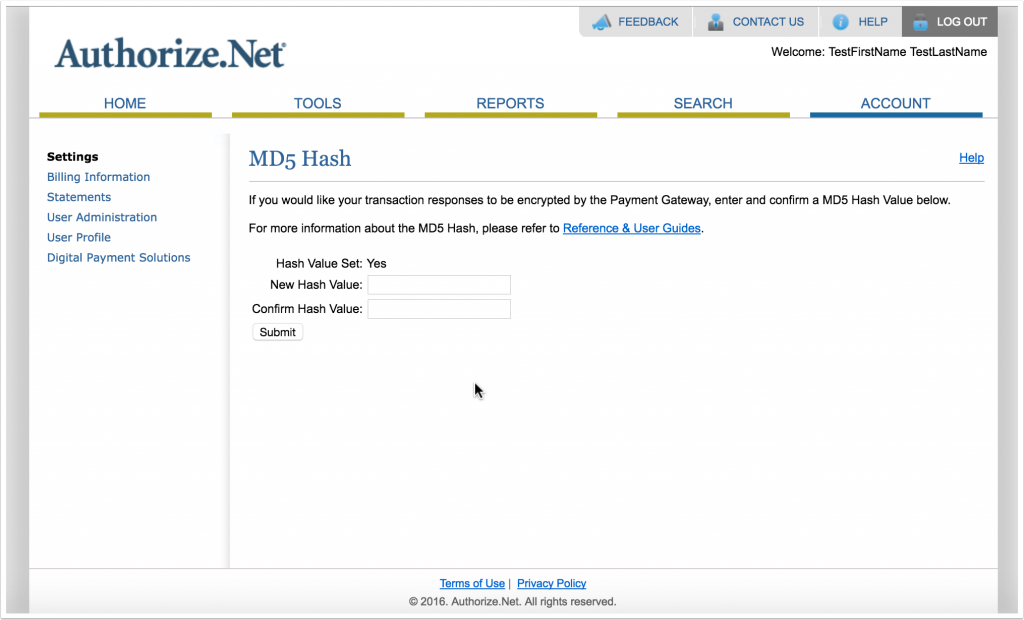
Add an MD5 Hash value. This can be anything you like, but you’ll need to make sure it exactly matches the MD5 Hash you set in your WordPress dashboard in the next step.
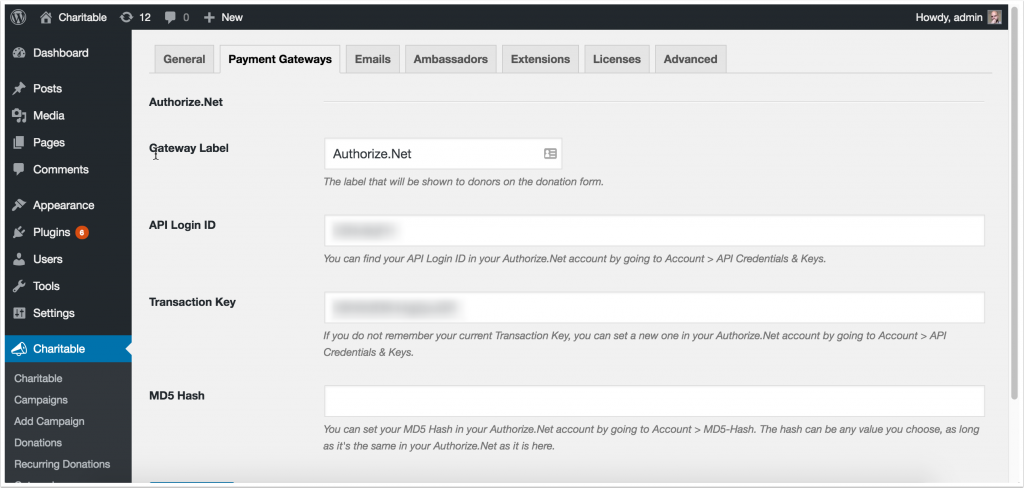
Next, you need to save your MD5 Hash value in your WordPress dashboard. Go to the Authorize.Net settings (Charitable > Settings > Payment Gateways > Authorize.Net) and enter the same MD5 Hash value you just entered in Authorize.Net.
