Accepting donations with Payrexx is now as easy as it can be. You’re just a few clicks away from configuring Payrexx on your donation site so that you can maximize both local and international donations.
Note: Before we start, be sure to install Charitable on your WordPress site. Then you can install and activate the Payrexx Addon. If you’re not sure how to do that, we recommend first reading our guide to installing Charitable extensions.
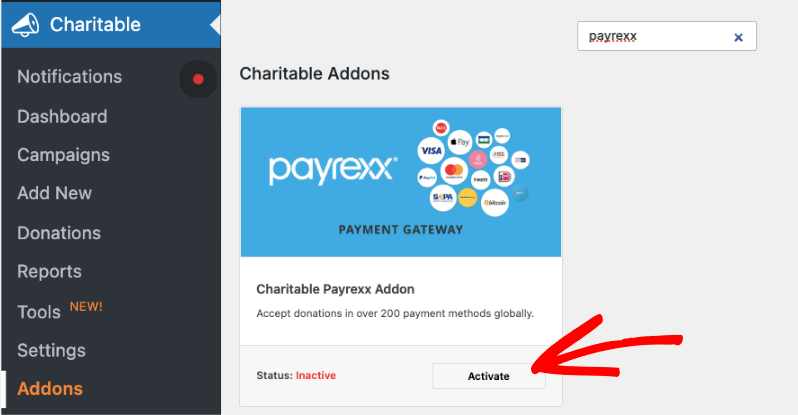
Activate the Payrexx Gateway
Once the Payrexx addon is activated, go to Charitable » Settings » Payment Gateways. Here, click on Enable Gateway in the Payrexx block.
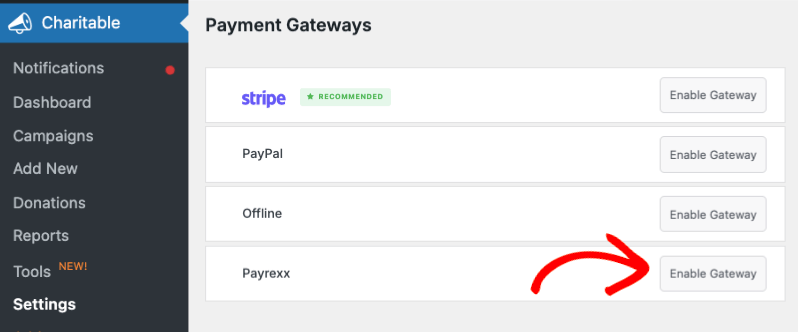
Once enabled, you’ll see a green ‘Gateway Settings’ button appear. Click on it to configure Payrexx.
Connecting to Payrexx
In the Gateway Settings page, you’ll see 2 fields to add your API key and Instance name.
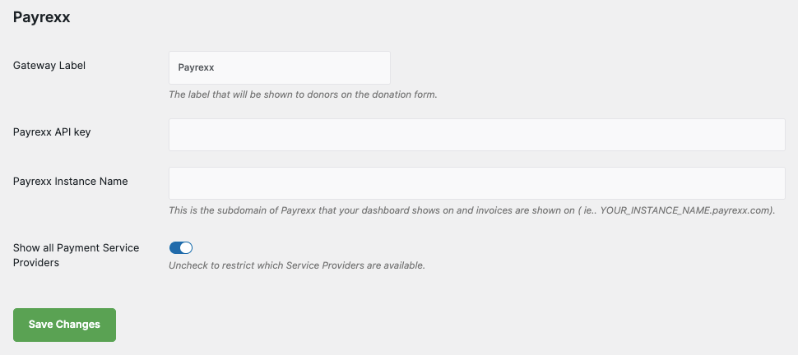
To find your API key and instance name, log into your Payrexx account.
If you don’t have a Payrexx account yet, now is the time to set one up: https://www.payrexx.com/
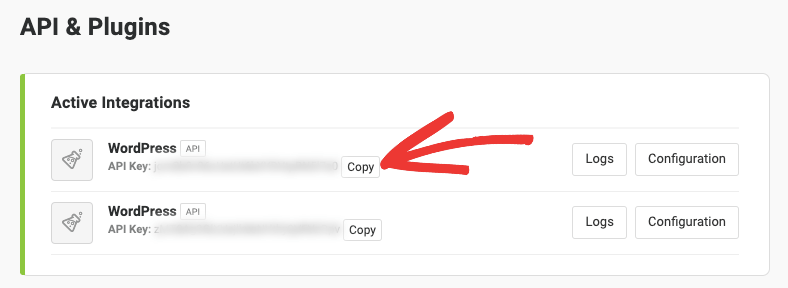
After logging in, you will be redirected to your Payrexx admin panel. From the left menu, open the API & Plugins page and choose the Add API Key button.

You can create a new set of API keys and copy them here. Then paste this value into your Payrexx settings in Charitable.
Next, you need your Instance name. You can find this in the URL of your Payrexx account. For example, in this screenshot, it’s “mydonationsite”.

Add this to your Charitable settings and ‘Save Changes’.
Add your webhook
The next step to set up your integration with Payrexx is to add a webhook in your Payrexx admin panel. Without a webhook, any donations paid through Payrexx will not be marked as ‘Paid’ automatically.
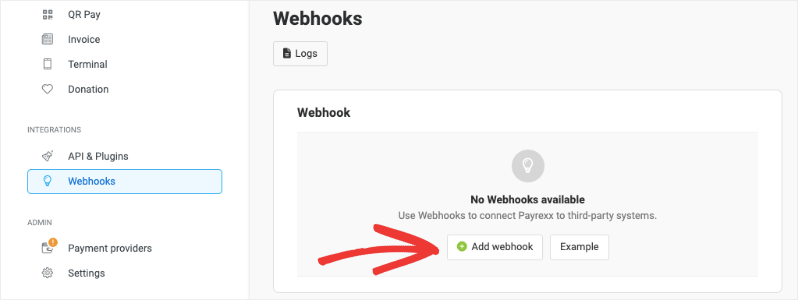
You need to create a webhook in your Payrexx dashboard. From the left menu, go to Webhooks » Add webhook. On the next page, you can add a name and create your webhook URL.
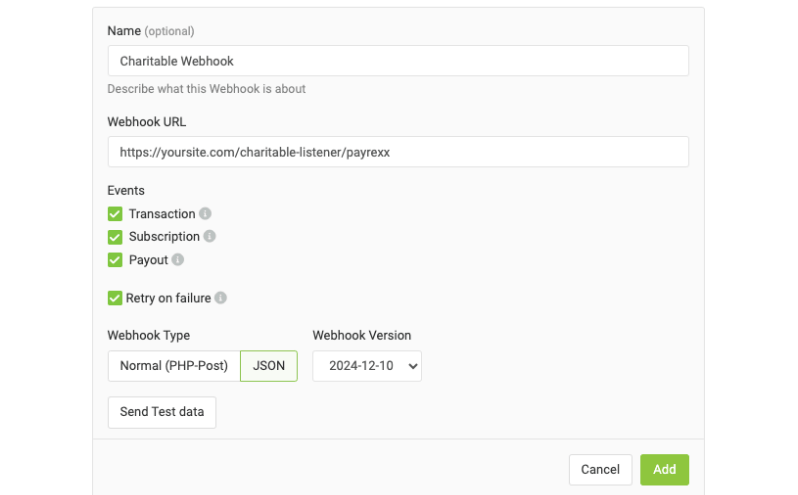
- The “Name” setting is optional, but you may wish to name it Charitable to make it obvious what the webhook is used for.
- Set the “Webhook URL” setting to your website’s domain followed by
/charitable-listener/payrexx. For example, if your website is https://mynonprofit.org, your webhook URL will be:https://mynonprofit.org/charitable-listener/payrexx - Select “JSON” for the “Webhook Type” setting.
- Choose the latest “Webhook Version” setting.
- Finally, click Add to save the webhook.
That’s it. You’re ready to create fundraiser campaigns with Payrexx as your payment gateway. Here’s the guide on How to Create a Fundraiser Campaign.
Looking to set up other payment options? Head over to our documentation page on Setting Up Payment Gateways.
