Do you want to add a thermometer or progress bar to your fundraiser campaign? This will show people how much you’ve raised and how much is left to go.
I add this to all of my campaigns now as it significantly drives the success of the campaign. When you showcase real-time progress towards your goal, it creates a sense of urgency and community involvement that can boost your donations. Plus, it gives you a visual tracker of campaign performance so you can figure out easily which campaigns need more promotion or improvement.
Now I’ve tried many ways to add a thermometer to my campaigns and it wasn’t easy to find one that actually updates in real-time as donations come in.
I’m going to show you the easiest way to do it in just a few clicks – no coding skills or expensive developer needed. You’ll get a stunning progress bar without fiddling with complex settings or worrying about breaking your site.
This process is as simple as a few clicks. I was actually surprised at how quickly you can set up a professional-looking progress bar that updates in real-time.
That said, let’s get started with this step-by-step tutorial.
Finding the Right Donation Thermometer Plugin
We’ve created a video describing all the instructions you need to follow to create a donation goal widget on your site.
However, if you prefer written instructions, continue reading below.
There are only a handful of tools out there that can help you create a donation thermometer – many of which don’t update on time or just don’t look good.
When looking for a donation thermometer, here’s what was on my list of must-have features:
- First, it’s super important that the tool is easy to use. It should be easy to set it up even if you’re a beginner because let’s face it when you’re running a non-profit, not everyone has the time to figure out tools that are so technically complicated.
- Next, the progress bar should update right away when someone donates. This way, people can see how their donation helps right when they give.
- It’s also cool if you can change how the thermometer looks. You want it to match your website, right? The best tools let you do this easily.
- Lastly, it’s great if you can change your donation goals whenever you need to. Sometimes you might want to run more than one fundraiser at a time, so look for a tool that lets you do that.
These are the main things I found that make a donation thermometer work well. The one tool that has all these features is Charitable, which is why I think it’s a great choice for most people using WordPress.
Here’s a sample of one of the donation campaigns I set up along with a progress bar that looks stunning:
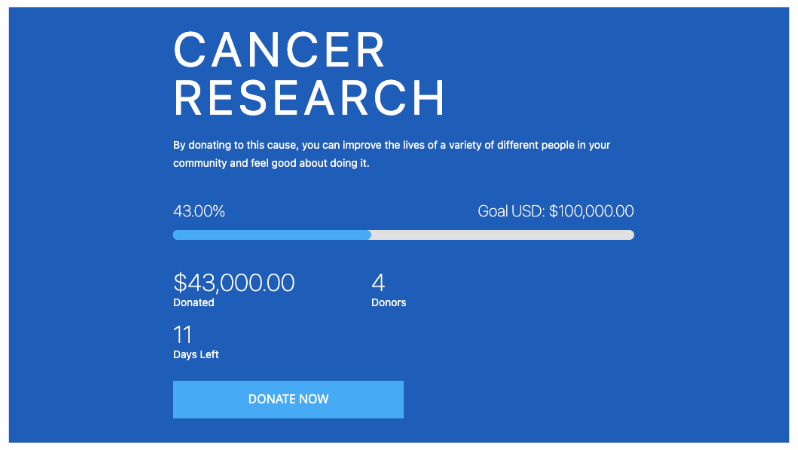
I created the entire fundraiser campaign in about 10 minutes. Keep in mind that you can change the colors and the content to match your preferences.
With the right tool in hand, let’s go ahead and create your fundraiser campaign with a thermometer to track donations.
Adding a Donation Thermometer in WordPress
Step 1: Add Charitable to Your WordPress Site
The first thing you want to do is head over to your WordPress admin. Navigate to Plugins » Add New, search for Charitable and install and activate it on your site.
If you’re looking to add advanced features to your campaign such as recurring donations, fee recovery, and Gift Aid, and more addons, then sign up for a 100% risk-free plan from Charitable.
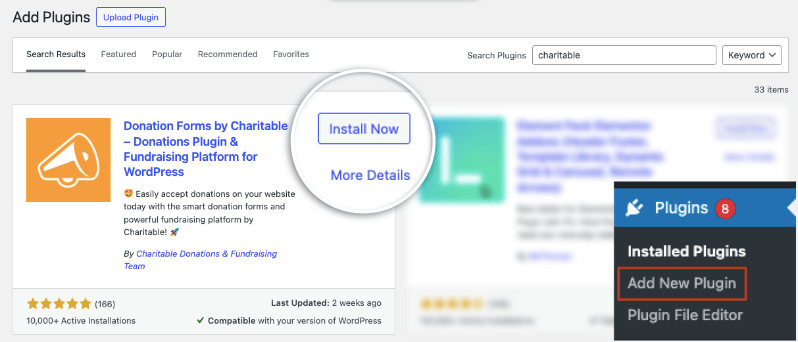
Once activated, you’ll see the Charitable tab appear in your WordPress menu on the left. If you subscribed to the premium plugin, open Charitable and go to the Settings page. Here, you can add your license key and activate it.
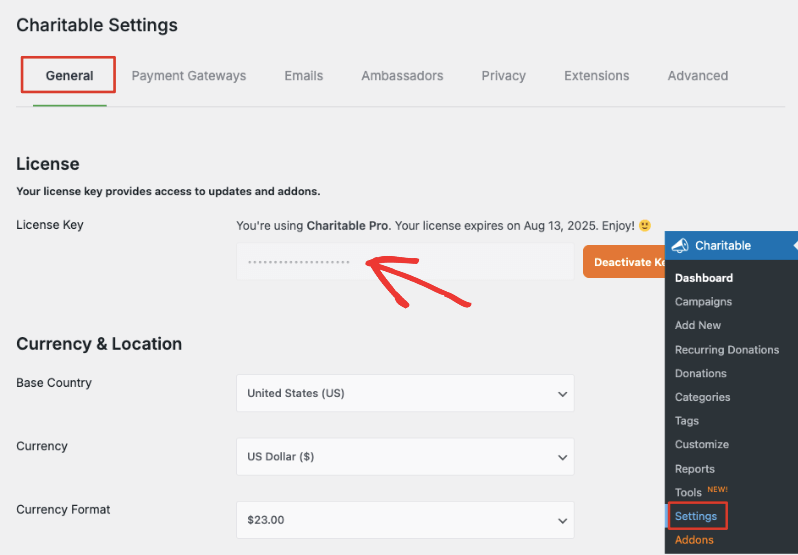
Now you’re ready to create your first fundraiser campaign with a progress bar.
Step 2: Add a New Campaign
Go to the Charitable » Add New tab. This will open up the campaign builder where you can name your campaign and select a template. There are plenty of designs to choose from and they’re neatly organized in categories on the left. You can search for one that matches what you’re looking for.
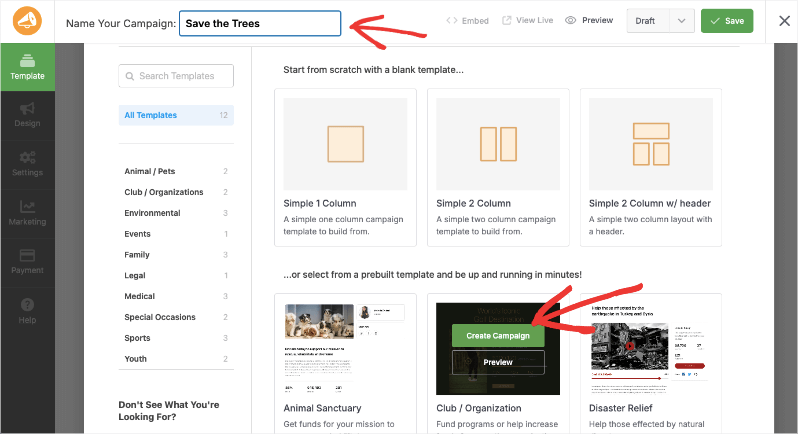
Some of these templates come with a premade donation thermometer that you can customize. You can also start from scratch with a blank template and add the thermometer later when you’re building the campaign.
When you hover your mouse over a template, you’ll see options to ‘Preview’ and ‘Create Campaign’. Choose your template and then click on ‘Create Campaign’ to customize it.
Step 3: Customize Your Fundraiser Campaign
Now the Charitable drag and drop campaign editor will open. You’ll see a preview of your campaign on the right and an editing taskbar on the left.
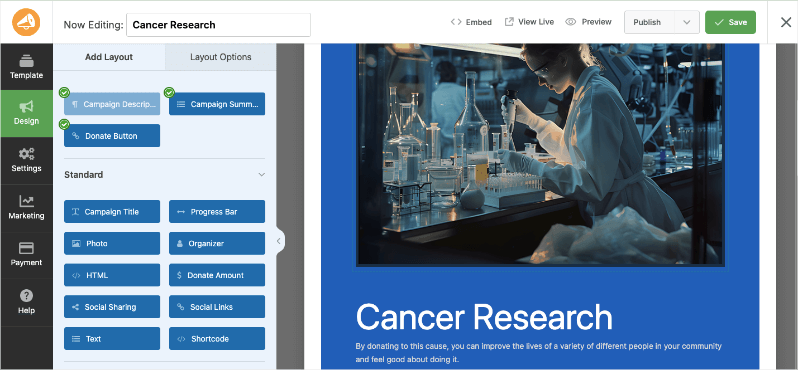
Under the ‘Add Layout’ tab, there are fields that you can drag and drop into your campaign design. If there’s a green tick on the field, it means that it’s already been added to the design.
For this template, a progress bar is already added, but if you want to add it in on your own, simply select the progress bar from the left menu and drag and drop it where you want it to appear.
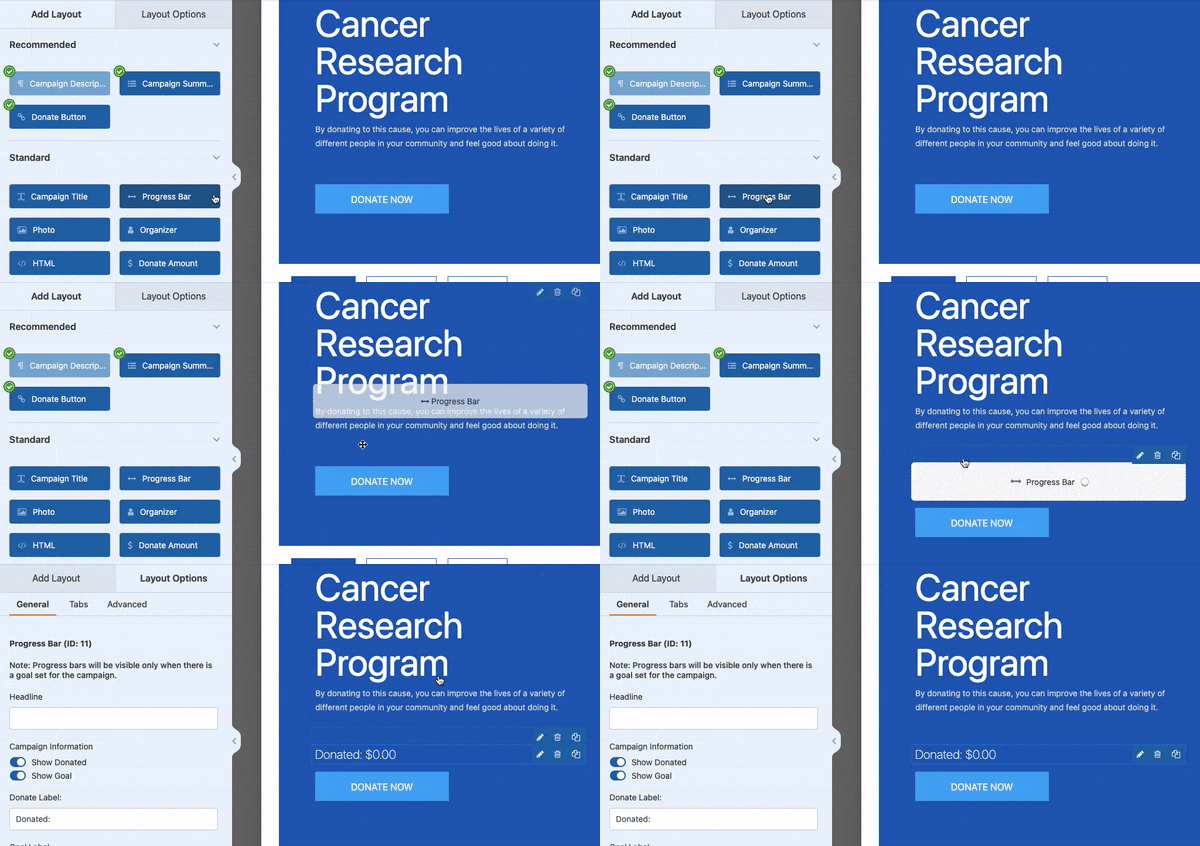
That’s actually it. Zero coding and technical stuff needed. Now you have a progress bar that will show your audience how much has been donated and how much is left to be raised.
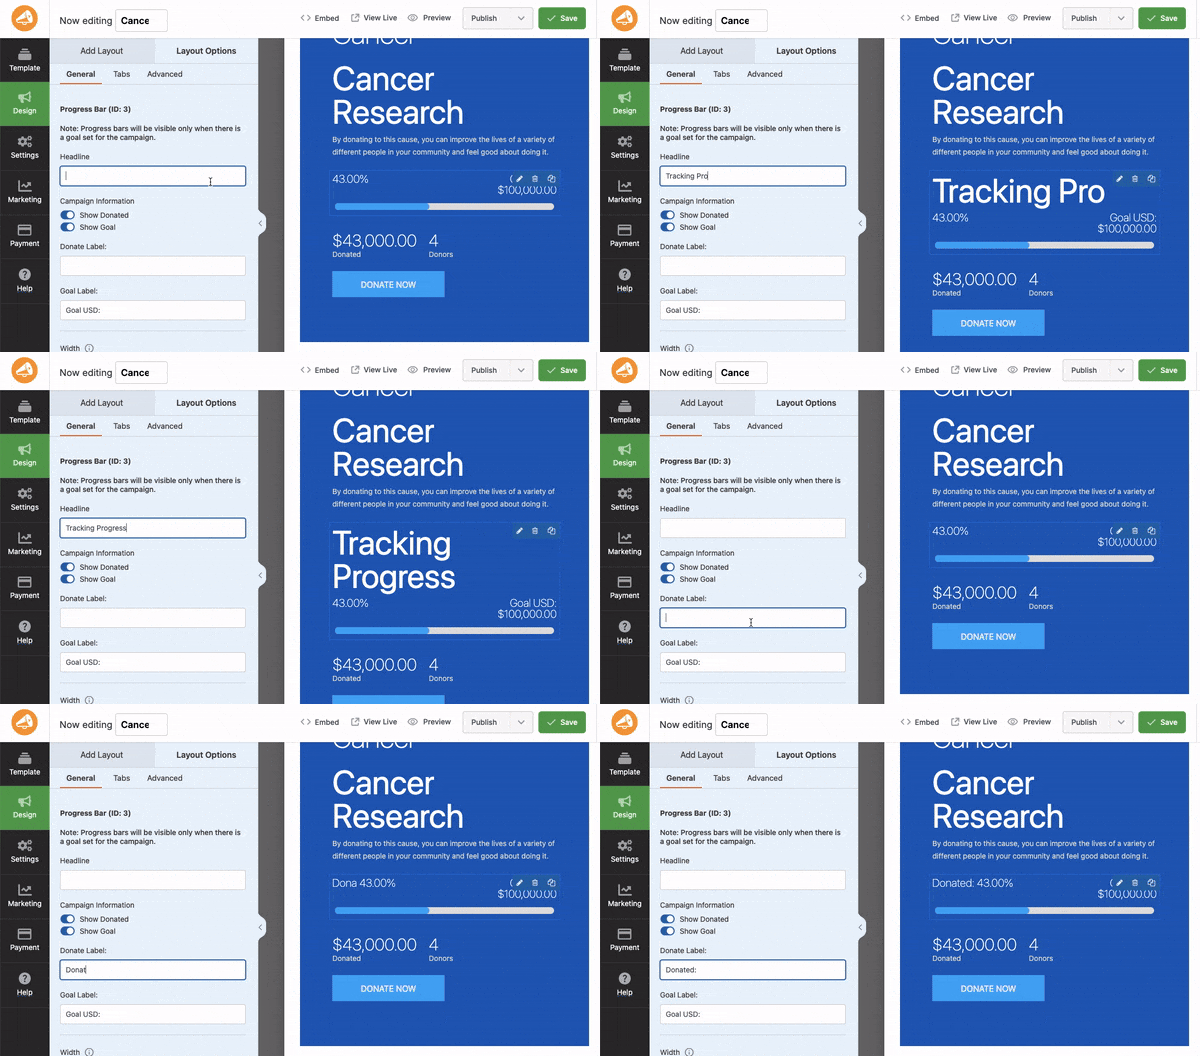
To customize it, click on the progress bar in the preview and you’ll get options to add a headline, show/hide donated amount and goal. You can also change the label of these fields here.
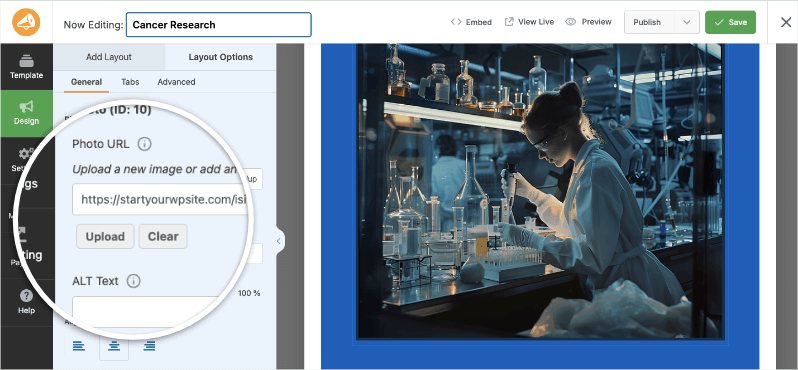
Like this, you can also customize other elements of your campaign like the donate button, campaign title, description, images, videos, and more. So for instance, if you want to replace the image, simply click on it in the preview, and you’ll see options to upload a new image on the left.
Under the Advanced tab, you can tweak the colors, style, size, and more.
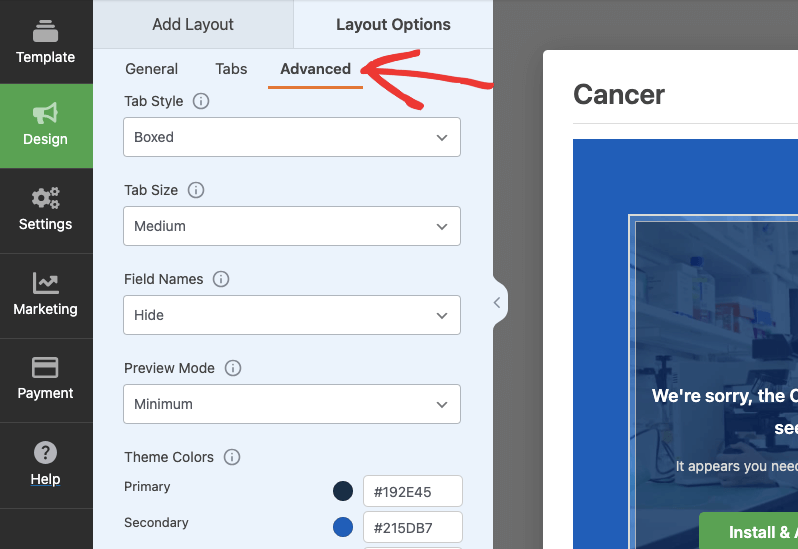
Save your campaign at the top-right corner of the screen. Now let’s configure some important settings of your campaign.
Step 4: Configure Campaign Settings
In the left menu, open the Settings tab. Here, you’ll see General Settings where you can add a goal amount and ending date for your campaign. Note that you can come back at anytime and alter this if you need to extend or shorten the campaign time and goal.
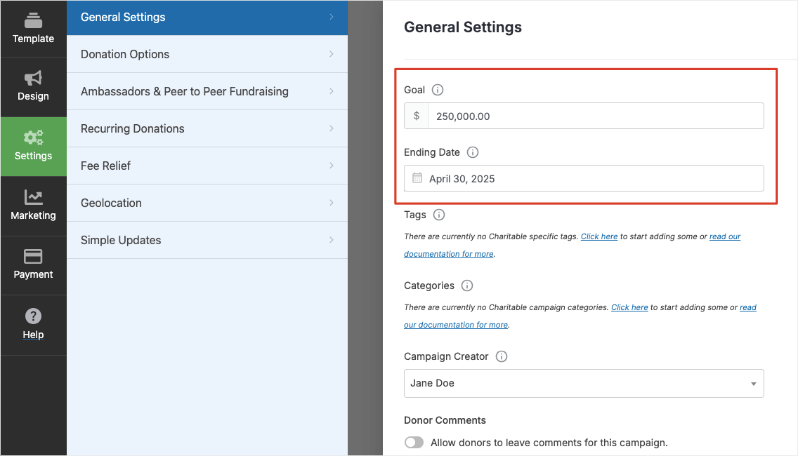
You can also create tags and categories to keep your campaigns organized.
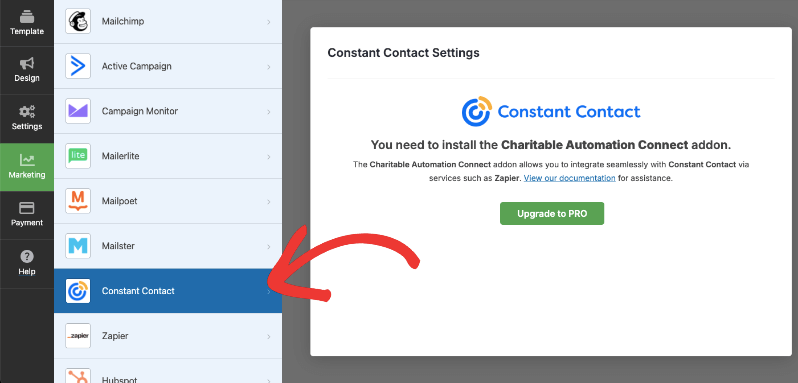
Next, open the Marketing tab, and here, you can connect your campaign to your favorite email marketing service like Constant Contact and Mailchimp.
Simply select your provider and follow the onscreen instructions to set it up. You only have to connect it once, then for future campaigns, you can select the established connection and move ahead.
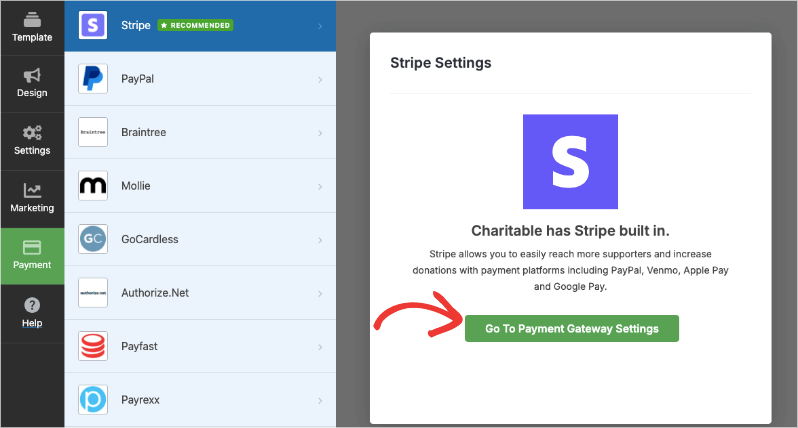
Next, in the Payments tab, you can set up various payment options for your donors. Charitable comes with Stripe built-in. This lets you accept payments through credit card, debit card, PayPal, Venmo, Apple Pay, and Google Pay.
You can also set up payment gateways like Braintree, Mollie, Authorize.net, Payfast, Payrexx, and more. Simply install the addon and follow the onscreen instructions.
If you click on ‘Go to Payment Gateway Settings’ here, you’ll be taken to the Charitable Settings page in a new tab. On this page, you can connect to your Stripe account. The process is simple and straightforward.
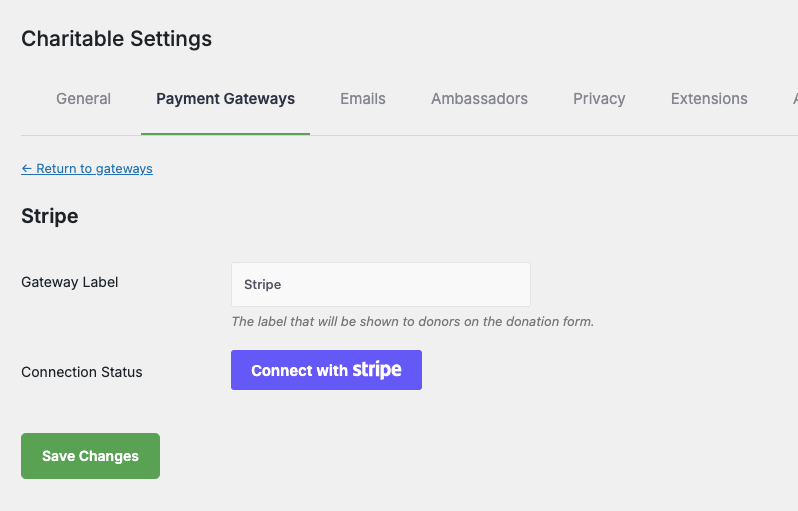
While you’re on this page, in the top menu, you can explore other settings like General, Emails, Privacy, and Advanced. In the Emails tab, you can enable automated emails that will be sent to donors, users, and admins.
You can enable a thank you email to be sent to the donor with their receipt when they make a donation. Along with that, you can also send a donation notification email to yourself or your site’s admin.
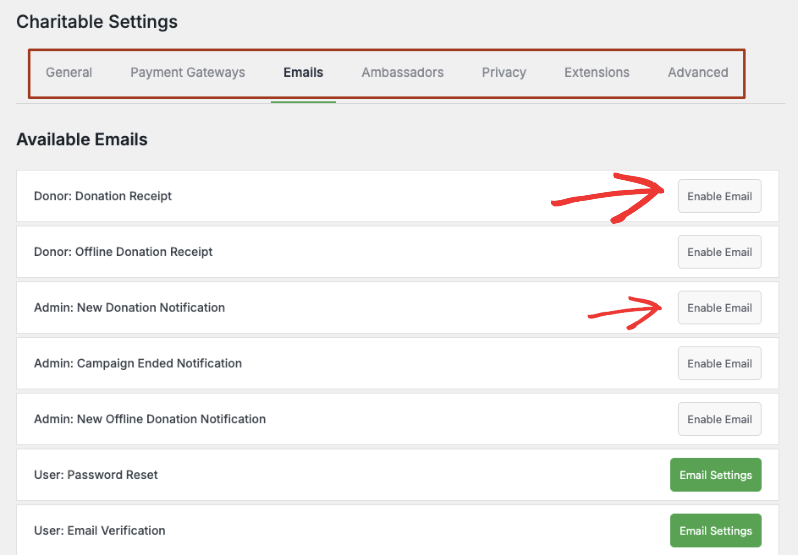
You can customize the content of these emails by clicking on ‘Email Settings’.
This is one feature I absolutely love because this automation saves you time and effort. As your donations grow, it can be a real hassle to keep track of sending receipts and managing donors. Charitable makes all of that easy.
Now, you’re ready to launch your campaign.
Step 5: Launch Your Campaign
Back to the Charitable campaign builder, at the top right-hand corner, you can save your campaign. Then switch the campaign’s status from ‘Draft’ to ‘Publish’.

Your campaign is now live and you can add it anywhere on your WordPress site. There’s an embed button that makes it easy to add it to an existing page or a new page on your site.
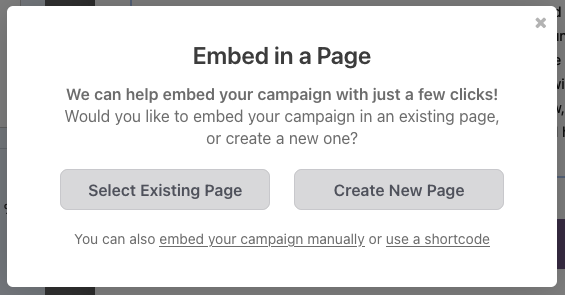
You can also add the campaign at any time you want to a page or post you’re creating inside the block editor.
To show you how it’s done, open a new page in the WordPress block editor, then add a block and search for ‘Charitable’.
Next, add this ‘Charitable Campaign’ block to your page and you’ll see a dropdown menu appear.
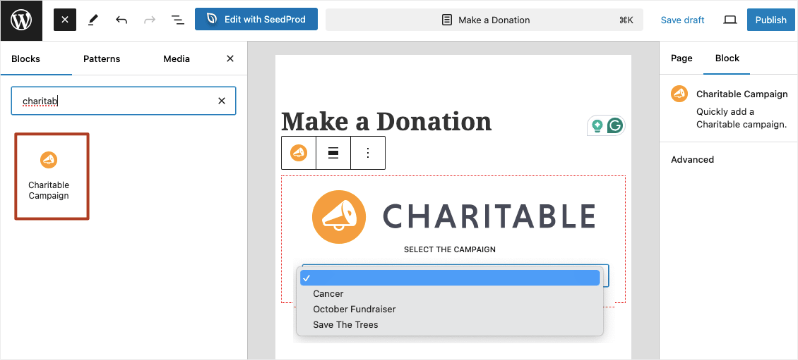
Select the campaign you want to appear on this page. Then you can preview it and publish the page. That’s it.
You’ve successfully created a stunning donation campaign with a fundraiser thermometer that will update in real-time on its own as people make donations.
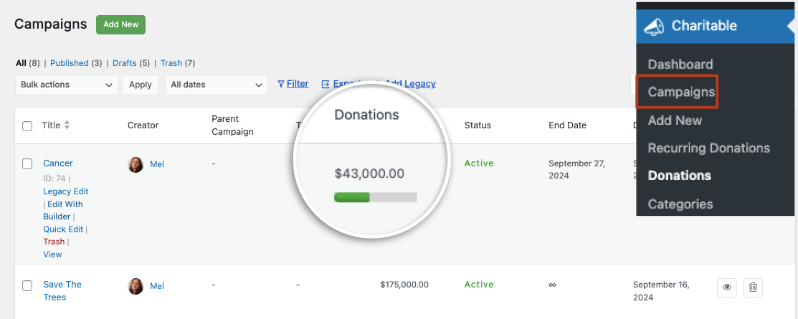
Before I wrap up this tutorial, take a look at the ‘Campaigns’ tab. Here, you’ll see a list of all the campaigns you’ve created along with the campaign progress. So you get a visual donation thermometer in the backend as well to clearly see how much has been raised and how much is left to go.
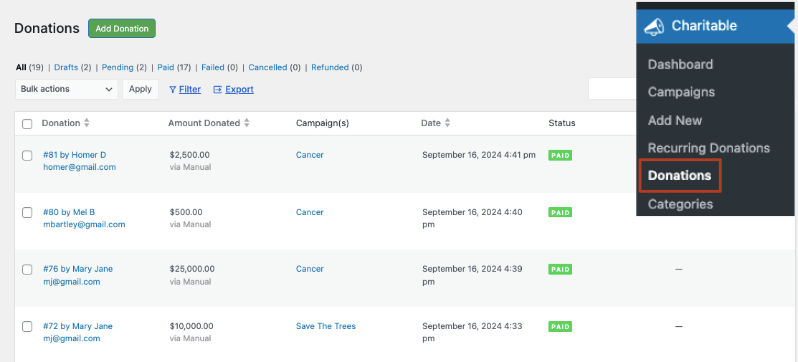
Under the Donations tab, you can easily view, manage, and edit your donations and donor details. It shows you the donor name, email, amount donated, to which campaign, along with the date and payment status. It uses the same interface as WordPress so everything is familiar, there’s no learning curve here.
That’s all. You should be all set now. I’ll answer frequently asked questions below.
FAQs on Adding a Fundraising Thermometer in WordPress
1. What is a fundraising thermometer?
A fundraising thermometer is a visual tool that shows how much money has been raised compared to the fundraising goal. It looks like a thermometer that “fills up” as donations come in.
2. Do I need coding skills to add a fundraising thermometer?
No. With plugins like Charitable, you can add a thermometer without any coding knowledge.
3. Can I customize the look of the thermometer?
Yes, Charitable gives you the option to use premade thermometer designs or create one with your own CSS style. You can change colors, sizes, and styles to match your non-profit WordPress theme.
4. Will the thermometer update automatically when someone donates?
Yes. The thermometer will update in real-time as donations come in.
5. Can I use a fundraising thermometer for multiple campaigns?
Yes, Charitable lets you create unlimited campaigns and add a fundraising thermometer or progress bar to as many as you need.
6. Are the fundraising thermometers mobile-friendly?
Charitable’s templates are designed to be mobile-responsive so your donation thermometers will display correctly on all devices.
7. Are fundraising thermometers only for monetary goals?
While they’re most commonly used for money, you can use them for other numerical goals, like volunteer hours or items donated. Charitable lets you change the labels of the progress bar to whatever you need it to be. However, it tracks donations made so you’ll have to manually add in the number of hours/items by making a new donation entry under that campaign.
8. Is it secure to use Charitable’s fundraising thermometer plugin?
Charitable prioritizes security. The plugin is built on industry best practices and it never stores any sensitive payment information on your site.
If you haven’t already signed up for Charitable, what are you waiting for? Try Charitable’s advanced features with a 100% risk-free account.
If, for any reason, you feel it’s not the right fit for you, we offer a 14-day money back guarantee.


Leave a Reply